# 如何发布一个npm包
开始之前确保本机nodejs已经安装,检查
node -v
有输出版本号,说明已安装 首先在npm (opens new window)网站上注册一个账号,这个账号会在之后用到
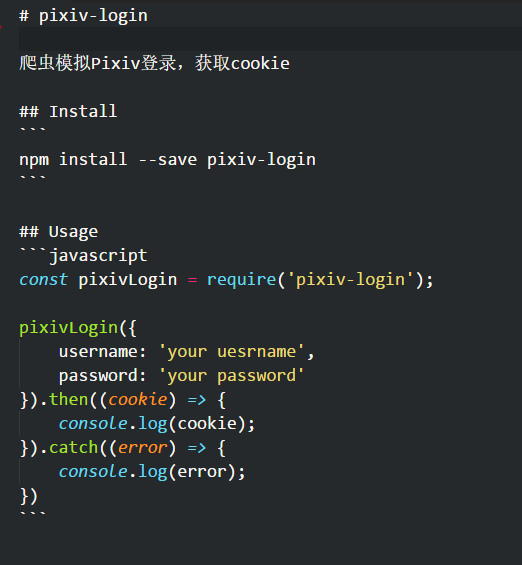
# pixiv-login
pixiv-login的功能就是模拟用户登陆网站pixiv,获取cookie,安装 源码 (opens new window)
npm install --save pixiv-login
使用:
const pixivLogin = require('pixiv-login');

pixivLogin({
    username: '你的用户名',
    password: '你的密码'
}).then((cookie) => {
    console.log(cookie);
}).catch((error) => {
    console.log(error);
});
2
3
4
5
6
7
8
9
10
# 开发工具
Mac平台 使用的vscode
# 初始化项目
mkdir npm-test
cd npm-test
npm init
2
3
一路回车就好
# 安装依赖
要模拟登陆,我们就需要一个http库,这里我选择了axios (opens new window),同时获取的html字符串我们需要解析,cheerio (opens new window)就是首选了
npm i axios cheerio --save
现在便携index.js文件
const axios = require('axios');
const cheerio = require('cheerio');

axios.get('https://www.pixiv.net')
    .then(function(response) {
        const $ = cheerio.load(response.data);
        const title = $('title').text();
        debugger;
        console.log(title);
    })
    .catch(function(error) {
        console.log(error);
    });
2
3
4
5
6
7
8
9
10
11
12
13
# 正式开始
虽然我们最后是要写一个npm包,但是首先,我们先把获取cookie的功能实现了,然后再思考怎么封装一个npm包,供其他人使用。
进入登陆页面 (opens new window),我们先登陆一次,看看前端向后端发送了那些数据。
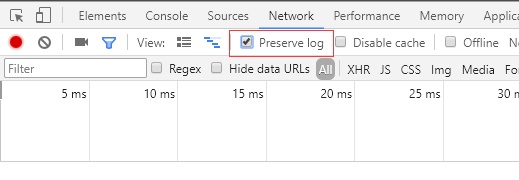
这里需要注意的是,我们要勾选preserve log,这样,即使页面刷新跳转了,http请求记录仍然回记录下来

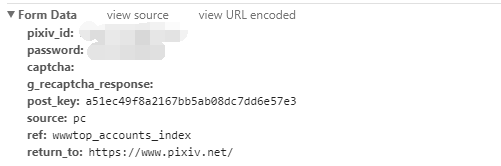
可以看到,post_key是登陆的关键点,p站使用了该值来防止CSRF
post_key怎么获取呢?
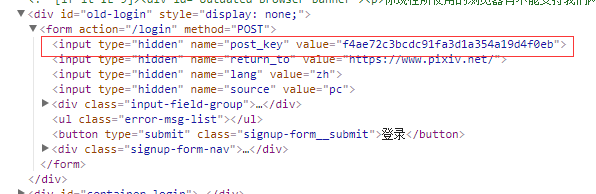
经过页面分析,发现登陆页面,有个隐藏的表单域(后来发现,其实首页就已经写出来了)

可以清除看到,post_key已经写出来了,我们只需要用cheerio解析出该input的值就OK了
const post_key = $('input[name="post_key"]').val();
获取post_key
const axios = require('axios');
const cheerio = require('cheerio');

const LOGIN_URL = 'https://accounts.pixiv.net/login?lang=zh&source=pc&view_type=page&ref=wwwtop_accounts_index';
const USER_AGENT = 'Mozilla/5.0 (Windows NT 6.1; WOW64) AppleWebKit/537.36 (KHTML, like Gecko) Chrome/60.0.3112.113 Safari/537.36';
const LOGIN_API = 'https://accounts.pixiv.net/api/login?lang=zh';


const getKey = axios({
    method: 'get',
    url: LOGIN_URL,
    headers: {
        'User-Agent': USER_AGENT
    }
}).then((response) => {
    const $ = cheerio.load(response.data);
    const post_key = $('input[name="post_key"]').val();
    const cookie = response.headers['set-cookie'].join('; ');
    if (post_key && cookie) {
        return { post_key, cookie };
    }
    return Promise.reject("no post_key");
}).catch((error) => {
    console.log(error);
});


getKey.then(({ post_key, cookie }) => {
    debugger;
})
2
3
4
5
6
7
8
9
10
11
12
13
14
15
16
17
18
19
20
21
22
23
24
25
26
27
28
29
30
注意:打开注册页时,注册页会返回一些cookie,这些cookie在登陆时也是需要随密码,用户名一起发送过去的
获取到了post_key,cookie,我们就可以愉快的把登陆数据发送给后台接口了
const querystring = require('querystring');
getKey.then(({ post_key, cookie }) => {
    axios({
        method: 'post',
        url: LOGIN_API,
        headers: {
            'User-Agent': USER_AGENT,
            'Content-Type': 'application/x-www-form-urlencoded; charset=UTF-8',
            'Origin': 'https://accounts.pixiv.net',
            'Referer': 'https://accounts.pixiv.net/login?lang=zh&source=pc&view_type=page&ref=wwwtop_accounts_index',
            'X-Requested-With': 'XMLHttpRequest',
            'Cookie': cookie
        },
        data: querystring.stringify({
            pixiv_id: '你的用户名',
            password: '你的密码',
            captcha: '',
            g_recaptcha_response: '',
            post_key: post_key,
            source: 'pc',
            ref: 'wwwtop_accounts_index',
            return_to: 'http://www.pixiv.net/'
        })
    }).then((response) => {
        if (response.headers['set-cookie']) {
            const cookie = response.headers['set-cookie'].join(' ;');
            debugger;
        } else {
            return Promise.reject(new Error("no cookie"))
        }

    }).catch((error) => {
        console.log(error);
    });
});
2
3
4
5
6
7
8
9
10
11
12
13
14
15
16
17
18
19
20
21
22
23
24
25
26
27
28
29
30
31
32
33
34
35
注意其中这段代码:
data: querystring.stringify({
      pixiv_id: '你的用户名',
      password: '你的密码',
      captcha: '',
      g_recaptcha_response: '',
      post_key: post_key,
      source: 'pc',
      ref: 'wwwtop_accounts_index',
      return_to: 'http://www.pixiv.net/'
  })
2
3
4
5
6
7
8
9
10
注意:axios默认数据格式是json,如果你想发送application/x-www-form-urlencoded的数据,就需要使用querystring模块
如果一切正常,那么效果如下:

其中,的PHPESSID和device_token就是服务器端返回的登陆标识,说明我们登陆成功了 程序运行的同时,你也很可能收到P站的登陆邮件 好了,目前为止,我们已经成功获取到了cookie,实现了最基本的功能
# 特别注意
程序不要运行太多次,因为每次运行,你就登陆一次P站,如果被P栈监测到频繁登陆,它会开启验证码登陆模式,这时,你除了需要发送用户名和密码,还需要向后台发送验证码值
data: querystring.stringify({
          pixiv_id: '你的用户名',
          password: '你的密码',
          captcha: '你还需要填验证码',
          g_recaptcha_response: '',
          post_key: post_key,
          source: 'pc',
          ref: 'wwwtop_accounts_index',
          return_to: 'http://www.pixiv.net/'
      })
2
3
4
5
6
7
8
9
10
也就是,captcha字段不再是空值了!
基本功能的完整代码
const axios = require('axios');
const cheerio = require('cheerio');
const querystring = require('querystring');

const LOGIN_URL = 'https://accounts.pixiv.net/login?lang=zh&source=pc&view_type=page&ref=wwwtop_accounts_index';
const USER_AGENT = 'Mozilla/5.0 (Windows NT 6.1; WOW64) AppleWebKit/537.36 (KHTML, like Gecko) Chrome/60.0.3112.113 Safari/537.36';
const LOGIN_API = 'https://accounts.pixiv.net/api/login?lang=zh';


const getKey = axios({
    method: 'get',
    url: LOGIN_URL,
    headers: {
        'User-Agent': USER_AGENT
    }
}).then((response) => {
    const $ = cheerio.load(response.data);
    const post_key = $('input[name="post_key"]').val();
    const cookie = response.headers['set-cookie'].join('; ');

    if (post_key && cookie) {
        return { post_key, cookie };
    }
    return Promise.reject("no post_key");
}).catch((error) => {
    console.log(error);
});


getKey.then(({ post_key, cookie }) => {
    axios({
        method: 'post',
        url: LOGIN_API,
        headers: {
            'User-Agent': USER_AGENT,
            'Content-Type': 'application/x-www-form-urlencoded; charset=UTF-8',
            'Origin': 'https://accounts.pixiv.net',
            'Referer': 'https://accounts.pixiv.net/login?lang=zh&source=pc&view_type=page&ref=wwwtop_accounts_index',
            'X-Requested-With': 'XMLHttpRequest',
            'Cookie': cookie
        },
        data: querystring.stringify({
            pixiv_id: '你的用户名',
            password: '你的密码',
            captcha: '',
            g_recaptcha_response: '',
            post_key: post_key,
            source: 'pc',
            ref: 'wwwtop_accounts_index',
            return_to: 'http://www.pixiv.net/'
        })
    }).then((response) => {
        if (response.headers['set-cookie']) {
            const cookie = response.headers['set-cookie'].join(' ;');
            console.log(cookie);
        } else {
            return Promise.reject(new Error("no cookie"));
        }

    }).catch((error) => {
        console.log(error);
    });
});
2
3
4
5
6
7
8
9
10
11
12
13
14
15
16
17
18
19
20
21
22
23
24
25
26
27
28
29
30
31
32
33
34
35
36
37
38
39
40
41
42
43
44
45
46
47
48
49
50
51
52
53
54
55
56
57
58
59
60
61
62
63
封装成一个npm包
登陆P站获取cookie这个功能,如果我们想让其他开发者也能方便调用,就可以考虑其封装为一个npm包发布出去
目录结构:
# 发布npm包
# README.md
每个npm包,一般都需要配一段介绍文字,来告诉使用者如何安装使用,比如lodash的首页
新建一个README.md,填写相关信息
有时,我们会看到一些npm包有很漂亮的版本号图标:

这些图标shieds (opens new window)上制作 登陆该网站,下拉到最下面

输入你想要的文字,版本号,颜色,然后点击按钮
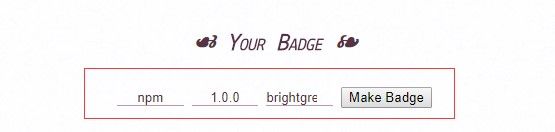
就可以得到图片的访问地址了

修改刚才的README.md,加上我们的版本号
# .gitignore
node_modules以及.vscode是完全不用上传的,所以为了防止发布时带上这些文件夹,我们要新建一个.gitignore
.vscode/
node_modules/
2
# 包发布
在终端输入
npm adduser
输入用户名,密码,邮箱即可登陆成功
这里还有一个坑!
如果你的npm使用的是淘宝镜像,那么是无法登陆成功的
最简单的解决方法:
npm i nrm -g
nrm use npm
2
nrm是个npm镜像管理工具,可以很方便的切换镜像源
登陆成功后,输入
npm whoami
如果出现了你的用户名,说明你已经成功登陆了
特别
因为包名字唯一,否则发布不了
修改pacakge.json文件的name字段
npm publish 即可发布成功啦!
# 更新已发布的包
更新包和发布包的命令是一样的,更新包只需修改package.json里面的version字段,也可以使用npm自带的版本控制命令修改版本号,更新的步骤为
- 修改版本号
- npm publish
# npm version
npm 官方提供了npm version来进行版本控制,其效果跟手动修改package.json里面的version字段是一样的,好处在于,可以在构建过程中用命令自动修改,而且具有语义化即Semantic versioning
npm version [<newversion> | major | minor | patch | premajor | preminor |
prepatch | prerelease | from-git]
2
其语义为:
major:主版本号(大版本)
minor:次版本号(小更新)
patch:补丁号(补丁)
premajor:预备主版本
preminor: 预备次版本
prepatch:预备补丁版本
prerelease:预发布版本
2
3
4
5
6
7
如初始版本为1.0.0,执行相关类型命令后,对应的语义为:
npm version patch  // 1.0.1 表示小的bug修复
npm version minor // 1.1.0 表示新增一些小功能
npm version mmajor // 2.0.0 表示大的版本或大升级
npm version preminor // 1.1.0-0 后面多了个0,表示预发布
2
3
4
可以在当前模块的package.json里面看到相应的版本变化
# 撤销发布
由于撤销发布会让把要撤销的包作为依赖的包不能正常工作,所以npm官方对包的撤销是有限制的:
- 不允许撤销发布已经超过24小时的包
- 如果在24小时内确实要撤销,需要
--force参数 - 即使撤销了发布的包,再次发布的时候也不能与之前被撤销的包的名称/版本其中之一相同,因为这两者构成的唯一性已经被占用,官方并没有随着测笑而删除
# npm publish
撤销发布的命令为 npm unpublish
npm unpublish my-test-project
// 报错
npm ERR! Refusing to delete entire project.
npm ERR! Run with --force to do this.
npm ERR! npm unpublish [<@scope>/]<pkg>[@<version>]

// 加 --force参数重新撤销发布
npm unpublish my-test-project --force
npm WARN using --force I sure hope you know what you are doing.
- my-test-project
2
3
4
5
6
7
8
9
10
11
# npm deprecate
npm unpublish的推荐替代命令:
npm deprecate <pkg>[@<version>] <message>
这个命令,并不会在npm上里撤销已有的包,但会在任何人尝试安装这个包的时候得到deprecated的警告,例如:
npm deprecate my-test-project 'this package is no longer maintained'